At Signs.com we offer an online design tool to help you create your custom sign. Our tool has advanced options to help make your sign the highest quality and most visually appealing product possible. Knowing how to utilize these advanced options will ensure that your sign is printed correctly to your specifications, avoiding any errors in the production process.
One available tool is the ‘Show bleed area’. You don’t have to be a graphic designer or Photoshop wizard to incorporate ‘bleed’ into your design. While bleed sounds like a gruesome way to describe a design element, we hope to clarify what the term means and how you can best use it for your signage needs.
What exactly is ‘bleed’?
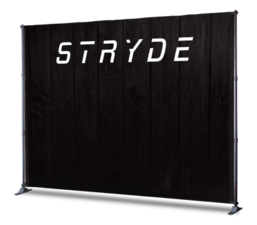
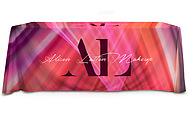
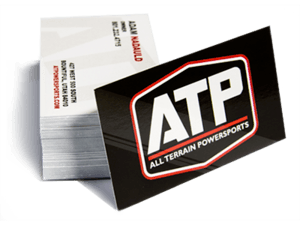
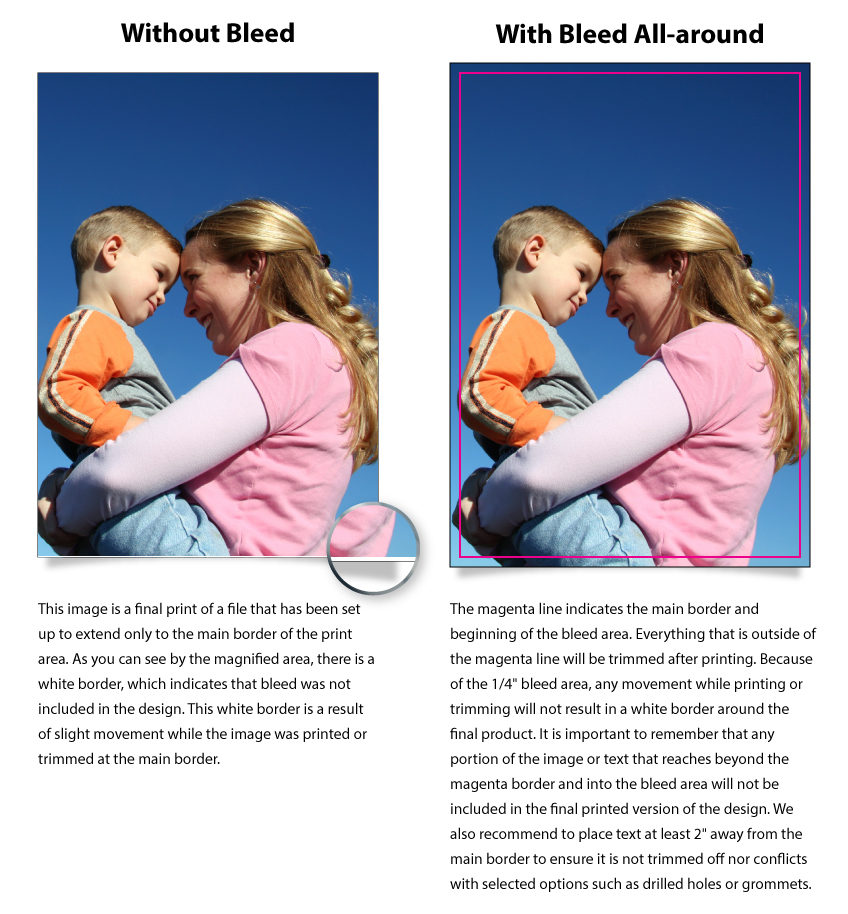
Bleed is a commonly used technique in the design and printing industry. Also known as “full bleed printing”, this technique allows a design to be printed larger than the end product’s actual size to avoid any undesired white space or border around the design once it is cut. Once printed, the design is trimmed down to the desired size of the product. Bleed is useful for designs with colored backgrounds, lettering or images that reach to the edge of the sign. It helps to prevent those objects from being trimmed incorrectly and cutting out part of the original image or lettering.
Signs.com uses a ¼” (.25) inch bleed area on all sides of the sign when printing. There is no real industry standard for bleed area and bleed requested or needed can vary by printer and even material type. Having said this, our bleed will always be ¼” regardless of the material type or the size of your sign. This ¼” area is also known as “bleed allowance”, or the area in which an image is allowed to extend beyond the printed area of the design. As noted above, this standard ¼” bleed allowance helps prevent distortions due to movement during the printing process or mistakes while trimming the edges.
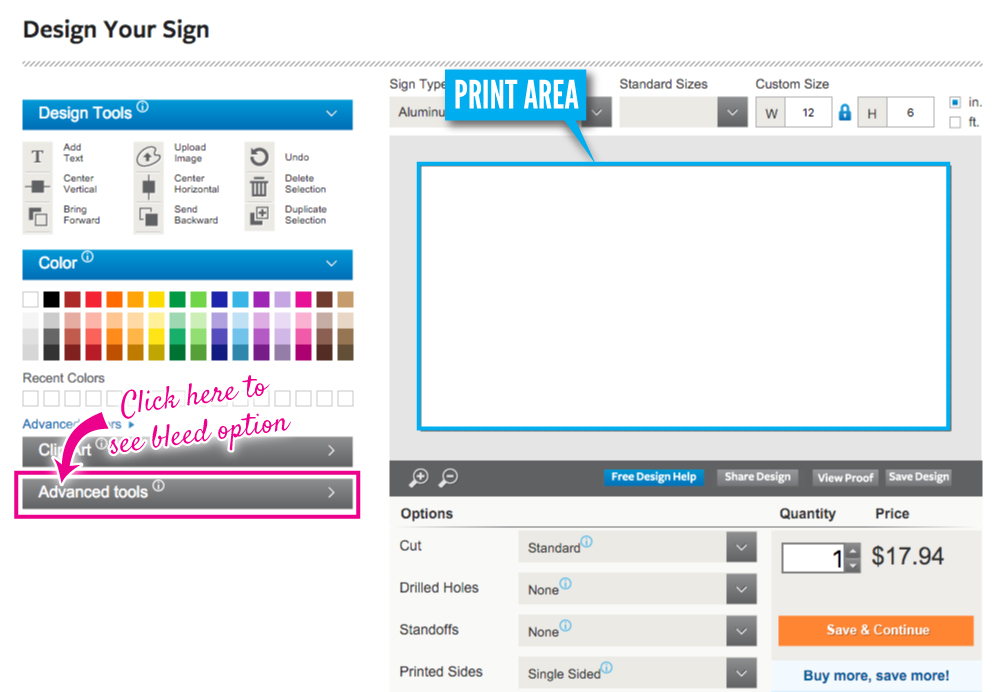
Looking at this design in our design tool will help to explain what bleed is. Before enabling the bleed option in advanced tools, notice how the white background ends at the border of the sign. For explanation purposes, we’ll call this the “main border”.
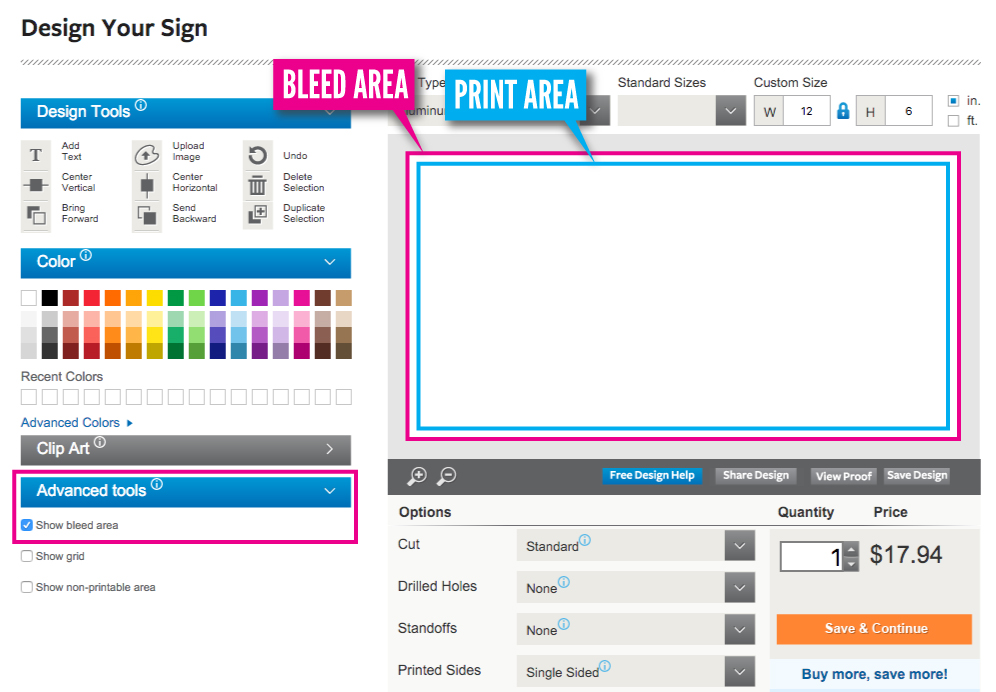
Once bleed is enabled there is an additional border placed around the design, allowing the image or design to extend beyond the “main border”. We’ll call this extension the “bleed area”.
Why is bleed important?
Now that you understand what we mean by “bleed” we’ll see how it’s applicable to you and your sign. Using bleed allows your design to continue past the main border of where the sign will be printed. The “bleed area” will be printed with your sign but will be considered excess material which will be trimmed off at the “main border”. By doing so, your design will cover the full area of the sign, without having an unwanted non-printed border around the edge of the sign. Bleed also ensures that the design will not be incorrectly trimmed and cut off any part of an image or lettering that is close to the edges of your sign.
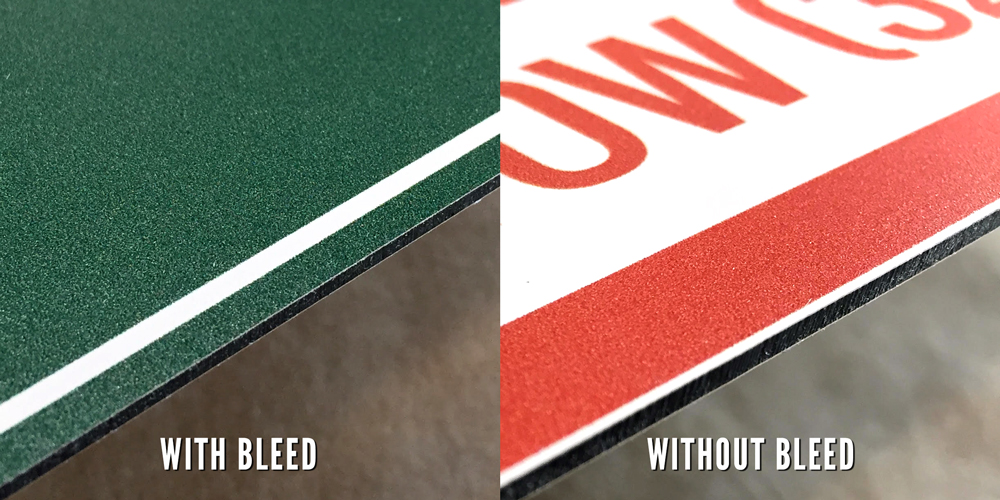
If you do not include bleed in your design, there is a small chance that it will be printed incorrectly or slightly off, resulting in excess whitespace around the edge of the sign. Design elements close to the edge might also be inadvertently trimmed.
Is it necessary?
While using the bleed option is not necessary to produce a sign, it is recommended in order to ensure that your sign is printed as you designed it. If you desire your sign to be professional looking without any color variation along the border, then using bleed will give you confidence that the final product will match what you designed it to look like.
We add bleed, without any additional charge, to every design that is not uploaded with it, so do not worry if you are unsure how to add bleed.
If you already have a file with our ¼” bleed incorporated, simply select the proper dimensions you want your sign to be and upload your file. For example, if you want a 72” x 36” banner, simply upload a file with the dimensions of 72.5” x 36.5”. This allows for a .25” bleed on every edge of the sign. If you select the “Show bleed area” advanced tool you’ll see that your bleed extends beyond the “main border”. Likewise, if you select one of our backgrounds or change the background color on our design tool it will automatically extend beyond the “main border” and provide a bleed area. When text is included in your design, we recommend that you place it 2″ away from the main border to ensure that it will not be trimmed off or drilled through when holes are included in the sign. Drilled holes will be visible in our design tool so it will be easy to see where to avoid placing text.
If you want to add bleed yourself you can use our design tool or follow the instructions provided below for the Adobe programs.
How do I use other programs to include a bleed area?
We’ve created step-by-step instructions if you’re making a design using a photo editing or design program and need to know how to add bleed to your design.
How To Add Bleed – Adobe Photoshop
Existing Document:
- Add guides lines by going to ‘view’, then click on ‘rulers’.
- Rulers will be placed in your document window. Click on the rulers and drag guidelines to all 4 edges of the document.
- Once the guidelines are set, go into the ‘image tab’, then click ‘canvas size’.
- Add .25” to both the height at width of the document. If you want a 12”x16” document to have a bleed area, then you would want to set the canvas size to 12.5”x16.5”
- Once the canvas size has been changed, the guidelines from the original document will stay, indicating the edge of the print area and beginning of the bleed area.
- Save as a PDF
New Document:
- Open a new document, setting your dpi (resolution) to 300 pixel/inch.
- When choosing the dimensions of the document add .5” to the width and height (allowing for .25” on all sides). For example, if you want a 12”x16” to have a bleed it must be set to 12.5”x16.5”
- Once the dimensions are set, use the guide tool to set guides at .25” for the height and width to designate where the bleed area will be.
- Design with the bleed area in mind, making sure not to put crucial text or images within the area.
- Save your document as a PDF to be uploaded using our design tool.
How To Add Bleed – Adobe InDesign
Existing document:
- Go to ‘file’ the click on ‘document setup’
- Then click on ‘more options’ to view the bleed options.
- Input .25” into the option.
- Make sure to save your document as a PDF.
New document:
- Open a new document, click on ‘bleed and slug’ to change bleed measurements provided by the program. We suggest using .25”, as this is the standard size for a bleed area.
- Click ‘preview’ to see what the bleed area will look like on your document (it will be represented by a red guide).
- Use the bleed guides while positioning your artwork or design to ensure that your design fits within the lines.
- Save your document as an Adobe PDF (Print)
How To Add Bleed – Adobe Illustrator
Existing Document:
- Click on ‘file’ then ‘document setup’
- Under the bleed and view heading, fill in the desired measurement (.25”) for the bleed.
- A red box will appear around your document, indicating where the bleed area is.
- Make sure your images and background extends to the edge of the red line to ensure that your document prints with bleed.
New Document:
- Open a new document.
- When the window appears with measurements for the new document, enter .25” in the bleed column.
- Make sure your resolution is at 300 dpi (pixels/inch).
It is worth noting that you can upload a PDF file to any of those programs to include bleed, just choose the “open with” option when opening the PDF to import it in the desired program.
Below we’ve included some of the most frequently asked questions we get about bleed on a daily basis.
Does It Matter What Type Of File I Upload To Your Design Tool To Use Bleed?
As long as you have enabled bleed in the file you plan on uploading it does not matter what type of file (Illustrator, InDesign, Photoshop) is uploaded to the design tool. This assumes of course you are using one of the formats we accept. JPEG, PNG, and PDF’s are all acceptable file types to use in our design tool. The rest are displayed when clicking on the “Upload Image” button in the “Design Tools” section. Make sure you save the file correctly before uploading to assure that the bleed will be used in our design tool.
Are Print And Copy Marks Directly Related To Bleed? Are These Part Of Your Design Tool?
Print marks is a general term indicating all types of marks within a file – crop marks, color bars, bleed marks, etc. None of these markings are used for our printing process and will not appear on the design tool. The only marks you may see are for drilled holes and grommets when these options are selected for certain material types. Please be aware of these when designing your sign(s).
Crop marks are fine, horizontal and vertical lines that define where the sign will be trimmed after printing. These lines are used to tell the cutting machines where the edge of the design should be and where to cut the sign. Signs.com’s streamlined production process uses special crop and trim marks that are added after your purchase. Therefore, they are not a necessary part of our design tool.
Do We Need To Include Crop or Print Marks In The Files We Upload To Your Design Tool?
No. Please do not include print or crop marks in your file you upload. Though we generally catch them if they are included, it is possible that they can be overlooked and sent through production to be printed with your design. We cannot guarantee that the marks would be removed before printing, which would cause them to appear in the final product.
Can I Use Bleed With My Desktop Printer?
Depending on the desired size of your document, bleed can be implemented with desktop printers. Printing business cards, post cards, or any other smaller document will allow you to add bleed to the document as long as the bleed is included in the size of the paper you are printing on.
It may be difficult to achieve a full bleed for larger documents that cover the entire sheet of paper. In some cases, printers have “print to the edge” or a “borderless” option to allow for a similar effect to full bleed. Using those options may cause the edge of your printed document to be faded or distorted. It’s recommended that you use a professional printing service to achieve a full bleed on larger documents.
If you’re still a little confused on how to incorporate bleed into your design, we have a staff of professional designers that would love to help clarify any questions. Feel free to give us a call at 888-222-4929 or visit our design services page. As always, our design services are free (that includes helping you add bleed to your sign). And to note one final time, we will attempt to add bleed to any file that doesn’t include bleed to ensure your signs come out just right!