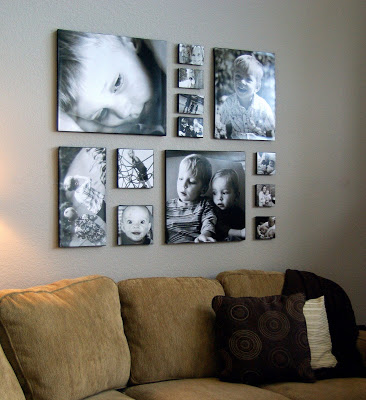
You’ve spent hours gathering your favorite photos and illustrations. You’ve had them all printed on canvas prints. You know the perfect space in your home where they’ll all hang. Now what? Creating a beautiful canvas print gallery display can seem daunting. But there’s a reason this trend is here to stay. It’s a great way to transform an empty space into a work of art.
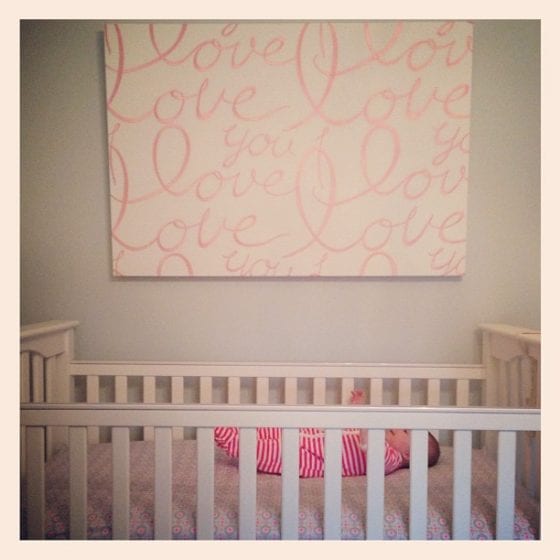
Source: Tales From the Crib
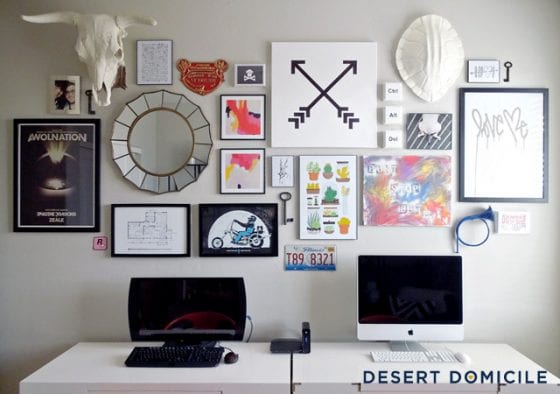
Source: Desert Domicile
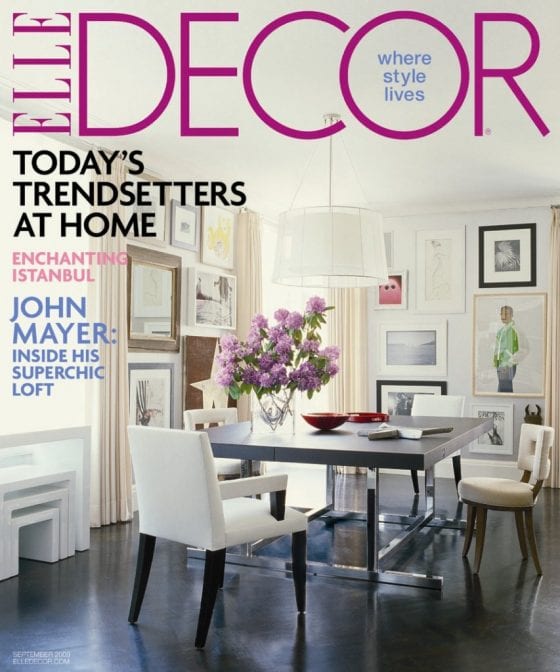
See what we mean? They look pretty amazing and add an incredible amount of visual interest to a space. Making them look cohesive and stylish can be a challenge, but don’t feel too overwhelmed. Following a few simple tips, your canvas print gallery can be magazine cover ready!
Source: Furniture Ideas
Here’s our step-by-step guide to designing, printing, and hanging your canvas gallery wall.
It’s important to note that even though images may contain framed photos, you can incorporate the same design idea using canvas prints with or without frames.
STEP ONE: Pick your wall space
Taking a look around your home, there might just be a big blank wall begging to be turned into a beautiful gallery wall. Even if there are more than a few possible gallery wall locations in your home, pick a wall that can be a focal point. Make sure there is enough space on that wall to do exactly what you want; keep in mind light switches, doors, and windows that could get in the way.
Family/Living Room: Because the family room is typically where we spend the most of our time, it’s a great place to show off your family’s unique personality with a canvas gallery wall. Showcase your family’s most recent photo shoot or display stunning vacation photos.
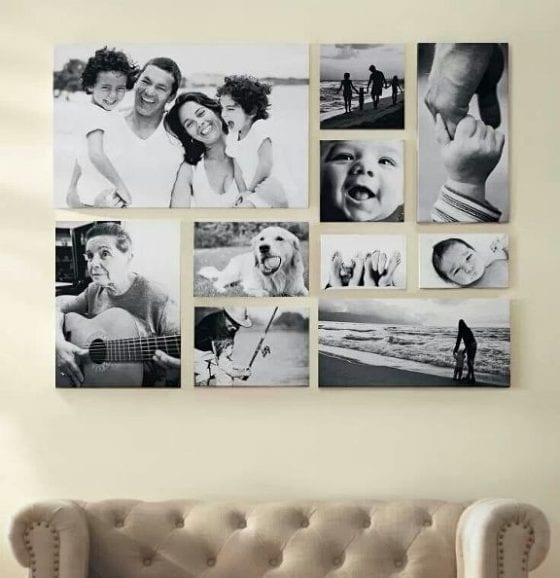
Source: Hometalk
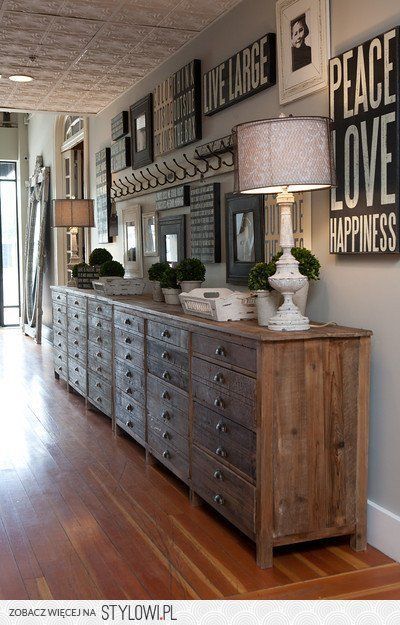
Entryway: Using canvas prints in an entryway setting can be a great way to add charm as soon as you walk into your home. Add an inspiring quote that you will see as you leave everyday, or create a family “Command Center” for collecting important papers, bills, and homework documents. Framed images can easily be replaced using canvas prints.
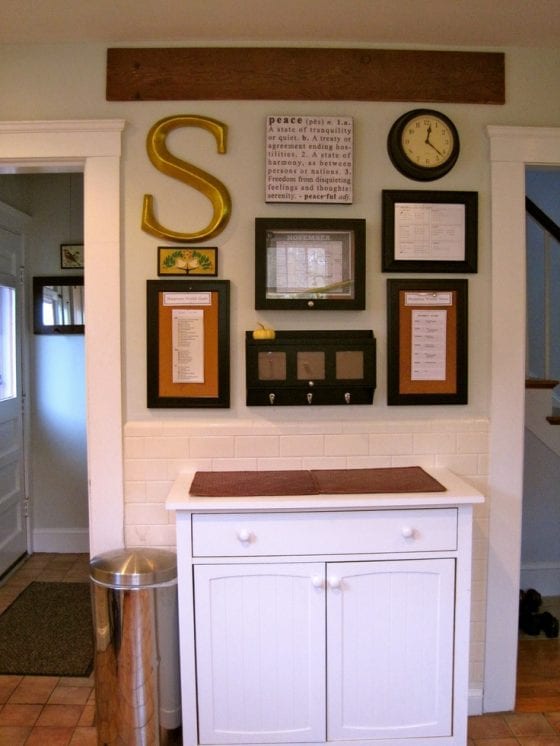
Source: Adventures in Organizing
Bedroom: Adding a personal touch to a master bedroom or a kids bedroom can create a feeling of intimacy. Large canvas prints make a statement above a master bed, or look especially delightful above a nursery crib.
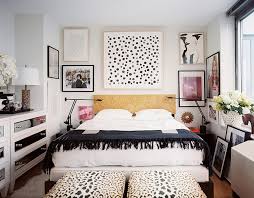
Source: Houzz
Source: McGrath II
Kitchen: Canvas prints may seem like an unexpected choice for the kitchen, but quirky prints or sayings can add a great focal point to any space. They even make a great holiday statement piece, like this Thanksgiving inspired canvas. Pro tip: while it goes without saying, just avoid places where your canvas might get wet!
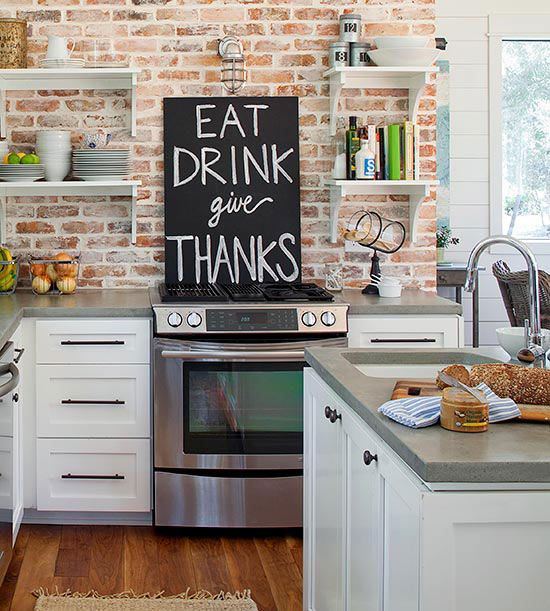
Source: Liz Marie Blog
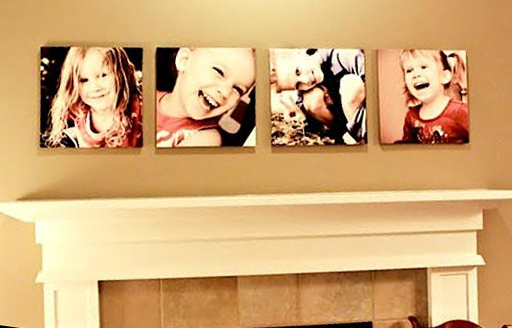
Above the Fireplace: Because it’s already such a statement in a room, the fireplace is a great place for a simple canvas print. If you’ve got an ornate fireplace, add a cute quote. If you’ve got something more simple in your space, try using a eye-catching photo or an elegant design.
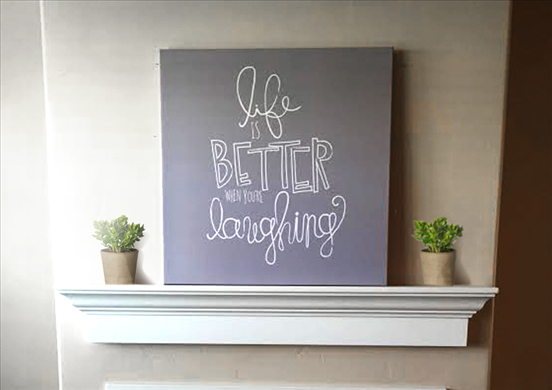
Source: Signs.com – click the link or above image to edit this canvas print
Keeping it simple is a great way to display what you love. Or mix it up with more than one print for more visual interest. Either prop it up against the wall or hang your canvas print above the mantle.
Source: Slowmama
Hallway: Hallways are often an afterthought of home decor, but they are prime spaces for creating canvas gallery walls. Large prints look great as one image.
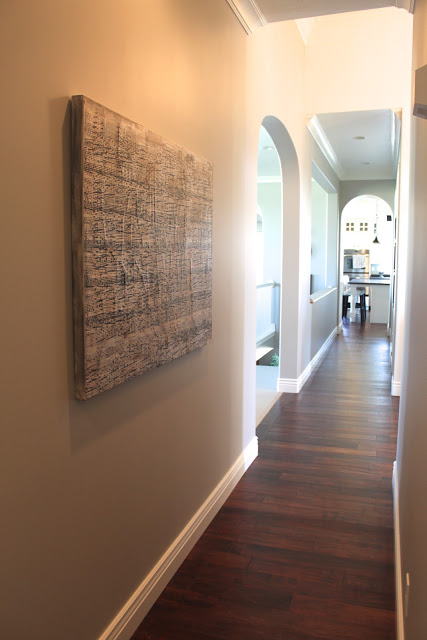
Source: Amy’s Casablanca
Hallways are great for canvas gallery walls. Because of the long, usually empty spaces, hallways can hold a variety of sizes of canvas that can be displayed in a variety of ways.
Source: My House My Home
Office: A home office can get a quick update with a beautiful canvas print or a canvas gallery wall. If you have a flat desktop, center your gallery wall around your computer screen for wow factor, or just cover a large empty wall with your favorite image.
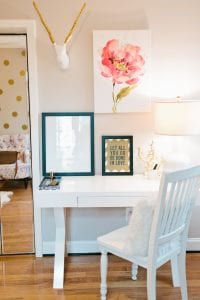
Source: Everygirl
Bathroom: Like the kitchen, you might not think that the bathroom is a place for a canvas gallery wall, but think again. Bathrooms often have large, blank walls perfect for canvas galleries. Small spaces can make a big impact. Create an entire display using canvas prints or incorporate framed photos as well, as seen below.
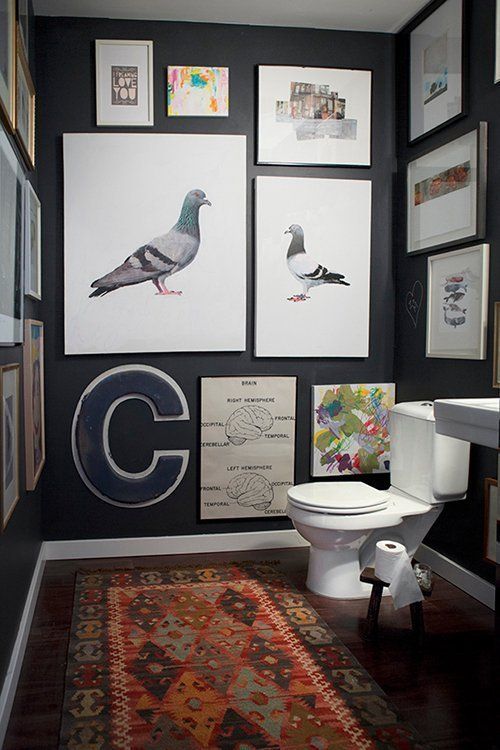
Source: Apartment Therapy
STEP TWO: Choose the right layout for your space
Whenever you’re designing a canvas gallery wall, it’s important to consider the space you have to work with. Once you’ve picked the right place in your home to create your wall of canvas prints, it’s time to pick the perfect layout. Layouts can be the deciding factor between a cohesive gallery wall and one that looks unfinished and scattered.
The size and magnitude of your gallery wall is generally up to your aesthetic choices. As a general rule of thumb, choose either a large photo as a focal point over a piece of furniture or an accent piece, or spread out a multitude of photos over a focal point without one large photo or image taking up too much of the space.
While the final layout is completely up to you, here are a few of our favorite choices of layouts. Contact us for these downloadable templates that you can follow at home!
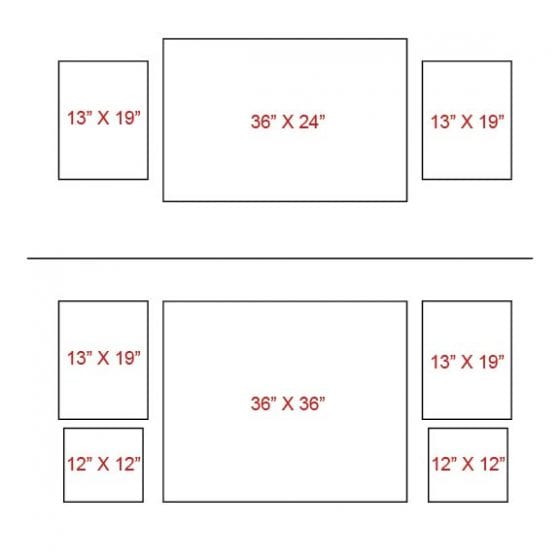
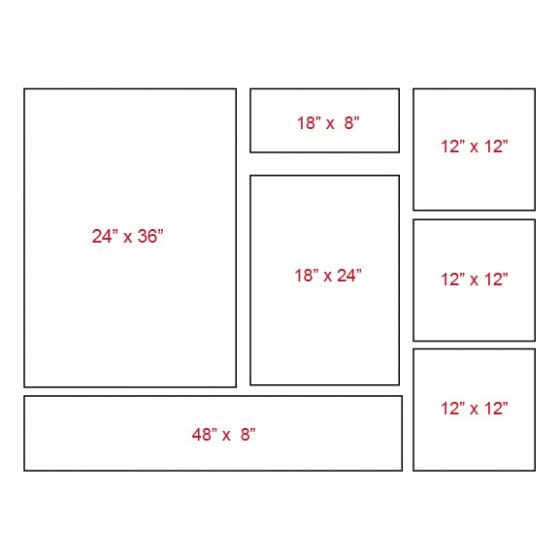
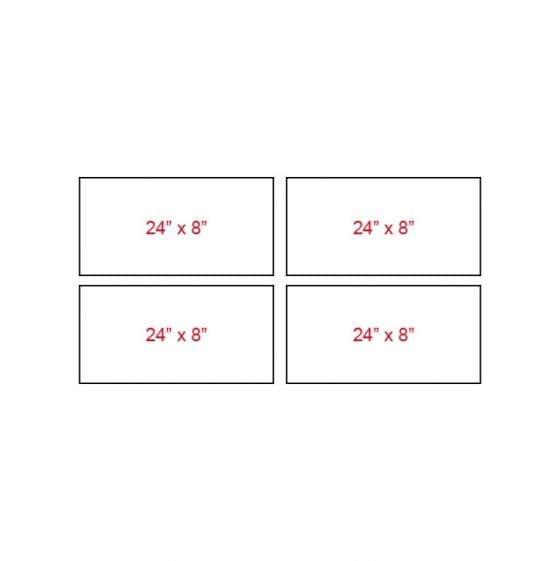
Symmetrical Layouts: Symmetry is the key to traditional design and designing a canvas gallery wall is no different. If you’re focusing on a symmetrical layout, be sure to align all the artwork centered with each other. This adds to the cohesive look of the gallery wall.

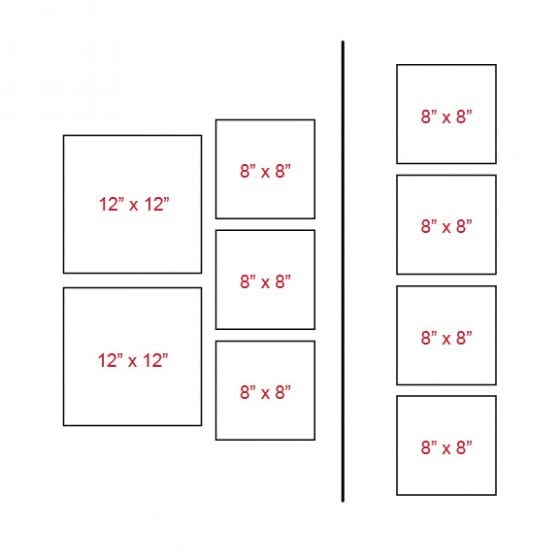
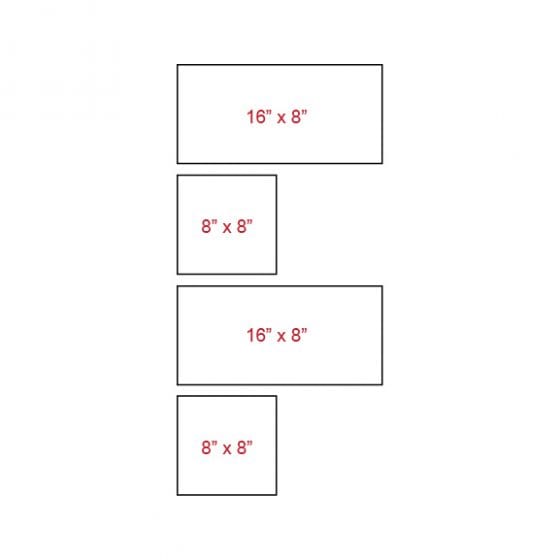
Asymmetrical Layouts: These types of layouts are perfect for the more modern, eclectic gallery canvas wall. For asymmetrical layouts, align the canvas wraps to the tops of each other. This gives the appearance of asymmetry, but also gives a directional line that is pleasing to the eye.
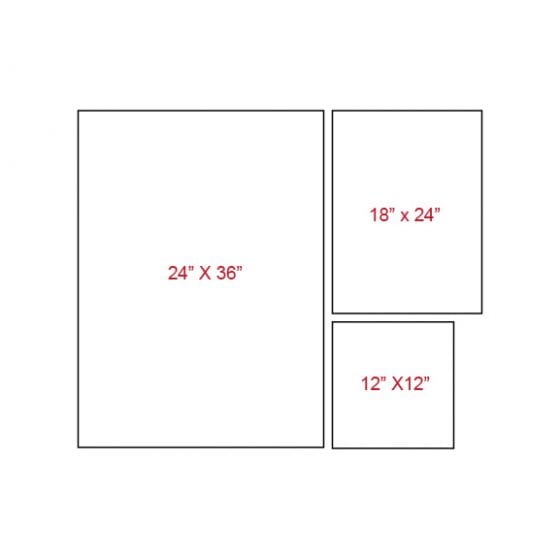
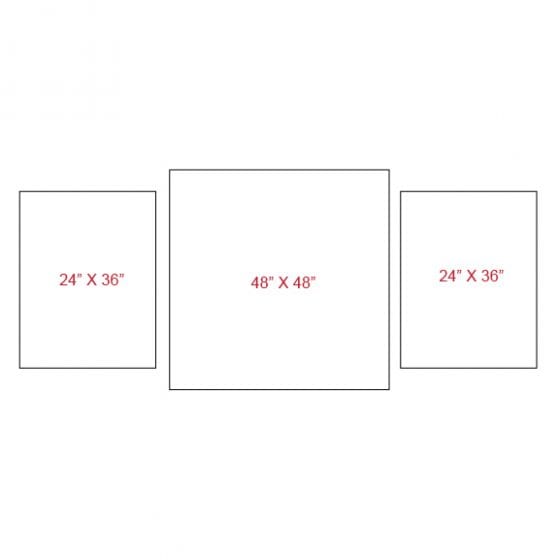
Large Canvas Layouts: Adding a large photo canvas wrap to any wall can be a beautiful focal point. Like symmetrical prints, the best course of action is to center these canvas wraps around the largest canvas in the group.

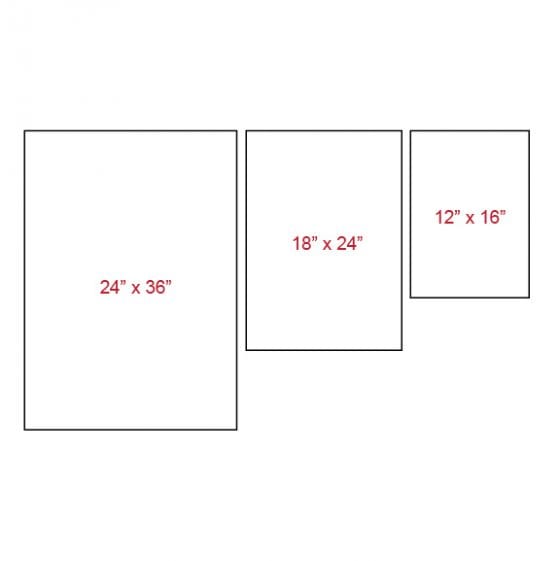
Vertical Layouts: Vertical layouts work very well for spaces that are long and skinny — think next to doors, around windows or on smaller walls. These work great hung either centered or aligned left or right (depending on your space).
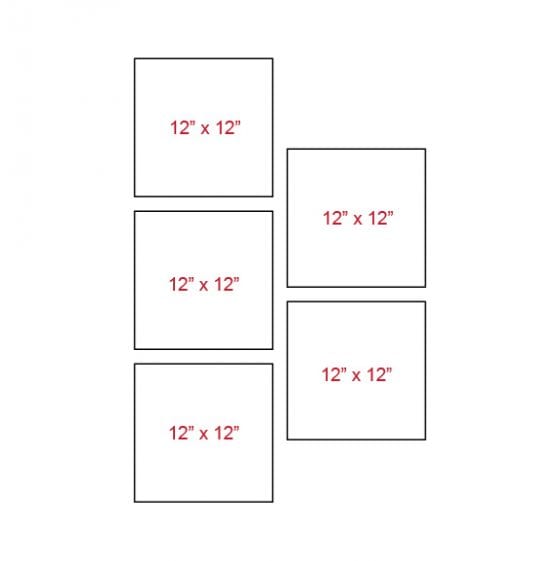
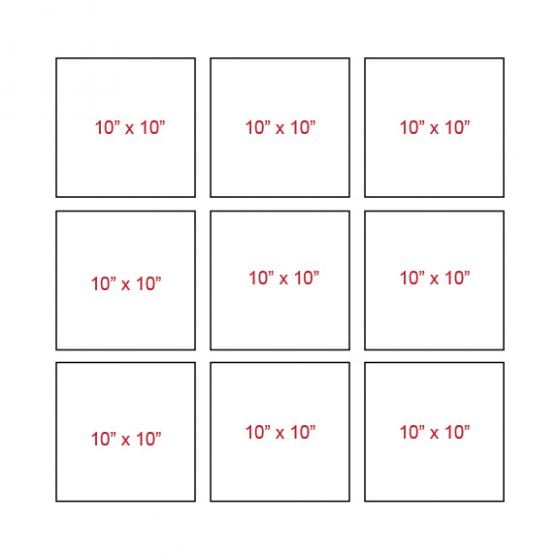
Grid Layouts: Grid layouts are just that… grids! They offer the most cohesive look of all types of layouts. Think about how aesthetically pleasing an Instagram profile page looks; that’s the look achieved with grid layouts. Make sure that the canvas wraps are both centered and aligned, which is easily achieved with canvas wraps of the same size.
STEP THREE: Decide on a theme or color palette
The best place to start when collecting images to put on a gallery wall is to select a color palette. Creating a custom color palette that fits within your style and home decor choices will make picking artwork or different types of prints for home so much easier. Even if style varies, the gallery wall will still look cohesive.
The colors you use in your gallery wall are completely up to you! Stunning gallery walls can be created from classic black and white photos or from multicolored eclectic pieces. The choice is yours.
Picking a color palette can seem daunting, but ask yourself these simple questions:
- What colors do I love? Starting with your favorite color means you won’t get sick of your gallery wall any time soon.
- What colors am I already stuck with? 99.99% of us can’t afford to redo the entire room to match a gallery wall. Some of us rent and can’t even paint the walls. So, it’s best to start from a reasonable spot. What are the undertones of the paint on your walls?
- How do I want this space to feel? Are you looking for a calming spa-like feel? Stick with harmonious colors (think blue, green, and teal). Uber modern? Try using monochromatic colors and neutrals (light red, red, and burgundy for example). Want a bohemian, eclectic look? Use contrasting colors (like blue and orange or yellow and purple).
If you’re using photos for your gallery wall, think about adding a filter or colored overlay in a program like photoshop to add cohesion to the photos you choose.
STEP FOUR: Collect your art
Well, this could be the most fun part of the whole process. Collect things that make you excited! As the author Marie Kondo wrote, “Ask yourself, ‘Does this item spark joy?’ If not, don’t bring it into your home.”
Collect your favorite photos from your past family vacation or from the most recent round of family portraits. Print those as high-quality photos for your gallery wall.
Alternatively, look online for beautiful graphic photos or moving quotes to include with your gallery wall. Scour Etsy or Pinterest boards for free or inexpensive printables and downloads.
STEP FIVE: Print your art
Using a custom printing service like Signs.com allows you to get high-quality prints with quick turnaround times. Since Signs.com offers custom sizing and different printing options, you’re able to quickly get exactly what you’re needing to make your gallery wall look professional.
Check out our canvas wraps for printing art or photos. Or, check out our Posters, which are perfect for framing!
STEP SIX: Layout your design (before you hang!)
The most surefire way to have a beautiful gallery wall is to take the extra step of laying out the design beforehand. This will ensure that everything lines up correctly and will help you avoid unnecessary holes in the walls that you’ll have to patch later.
Lay out the pieces of your gallery wall on the floor to make sure you like the layout. Nothing should go on the wall until you’re happy with the arrangement on the floor.
Many people use what’s called the “Newspaper Trick”. Cut the exact sizes of the canvases and frames you’ll be hanging on your gallery wall. Mark where the nail holes will need to be in order to hang the signs correctly. Put these pieces of newspaper (or craft paper) on your wall and hammer away!
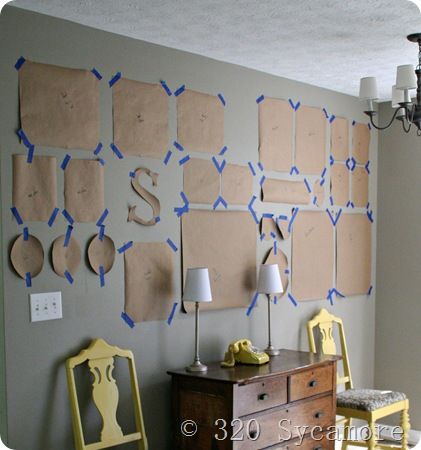
Source: 320 Sycamore
Getting the best layout for your space is easy with these three numbers.
- 57” – the ideal height for art on the wall: Always hang your artwork at 57″ on center, or so that the middle of piece of art is at 57” (obviously, the hook will be higher). Decor specialist Maxwell Ryan writes, “Interestingly, the 57″ standard represents the average human eye-height and is regularly used as a standard in many galleries and museums.” Read more about this trick here. This standard is not always possible.
- 3” to 6” – the ideal distance between pieces of art
- 6” to 8” – the ideal distance between the bottom edge of art and the top edge of a piece of furniture: This rule applies to everything from couches to fireplaces, and countertops to end tables, no matter how much of wall space you have.
STEP SEVEN: Hang your canvas gallery wall
The hard labor is upon us! Hanging your canvases and art is really quick and simple with things like the newspaper trick and the 57” rule listed above.
Be sure to measure (again) the space between each piece of art as well as the location of the hanging hooks or picture mounting hardware.
For smaller pieces of art with mounting hardware already attached to the back or smaller canvas prints, one nail will work best. Larger art may require more than one nail to hang. This is especially true for canvas prints that only have a “ledge” wood frame on the back. Any piece of art that is heavier than 15lbs should be hung using picture wire or hanging hooks.
If you plan to hang more than one gallery wall in your home, consider investing in a laser level to get lines just right. Use poster putty in each of the corners of the piece of art to keep them hanging straight for years to come (It doesn’t damage the paint).
STEP EIGHT: Celebrate!
Whew! You’ve made it! Now it’s time to step back and admire all of your hard work!

Source: Satori Design