


-10710.jpg)


Perforated Vehicle Decals

Tell us what sign you want, how big you want it, and what you would like on it and we'll have it ready for you in no time!
No results found for "{{previous_search_keyword}}"
Tell us what you want your product to look like and our team of professional designers will bring your vision to life!
And the best part: All design fees will be fully credited to your product purchase!
 171K
171K
Store Ratings
 Verified Purchase
Verified Purchase
Verified Purchase
Verified Purchase
Verified Purchase
Verified Purchase
Verified Purchase
Verified Purchase
Verified Purchase
Verified Purchase
Verified Purchase
Verified Purchase
Verified Purchase
Verified Purchase
Verified Purchase
Verified Purchase
Verified Purchase
Verified Purchase
Verified Purchase
Verified Purchase
Verified Purchase
Verified Purchase
Verified Purchase
Verified Purchase
Verified Purchase
Verified Purchase
Verified Purchase
Verified Purchase
Verified Purchase
Verified Purchase
Verified Purchase
Verified Purchase
Verified Purchase
Verified Purchase
Verified Purchase
Verified Purchase
Verified Purchase
Verified Purchase
Verified Purchase
Verified Purchase
Verified Purchase
Verified Purchase
Verified Purchase
Verified Purchase
Verified Purchase
Verified Purchase
Verified Purchase
Verified Purchase
Verified Purchase
Verified Purchase
Verified Purchase
Verified Purchase
Verified Purchase
Verified Purchase
Verified Purchase
Verified Purchase
Verified Purchase
Verified Purchase
Verified Purchase
Verified Purchase
Verified Purchase
Verified Purchase
Verified Purchase
Verified Purchase
Verified Purchase
Verified Purchase
Verified Purchase
Verified Purchase
Verified Purchase
Transform Your Vehicle’s Window in Four Simple Steps


Why Signs.com?

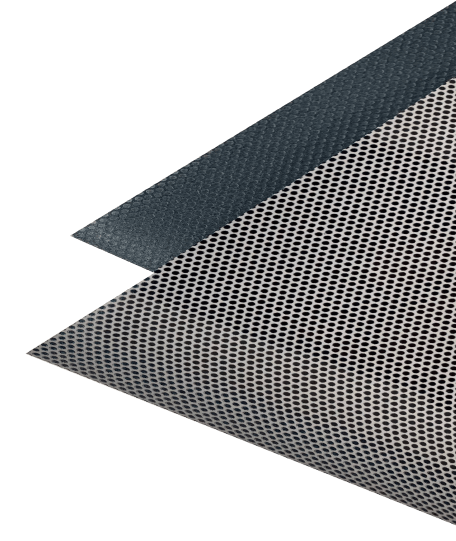
What Are Rear Window Graphics?
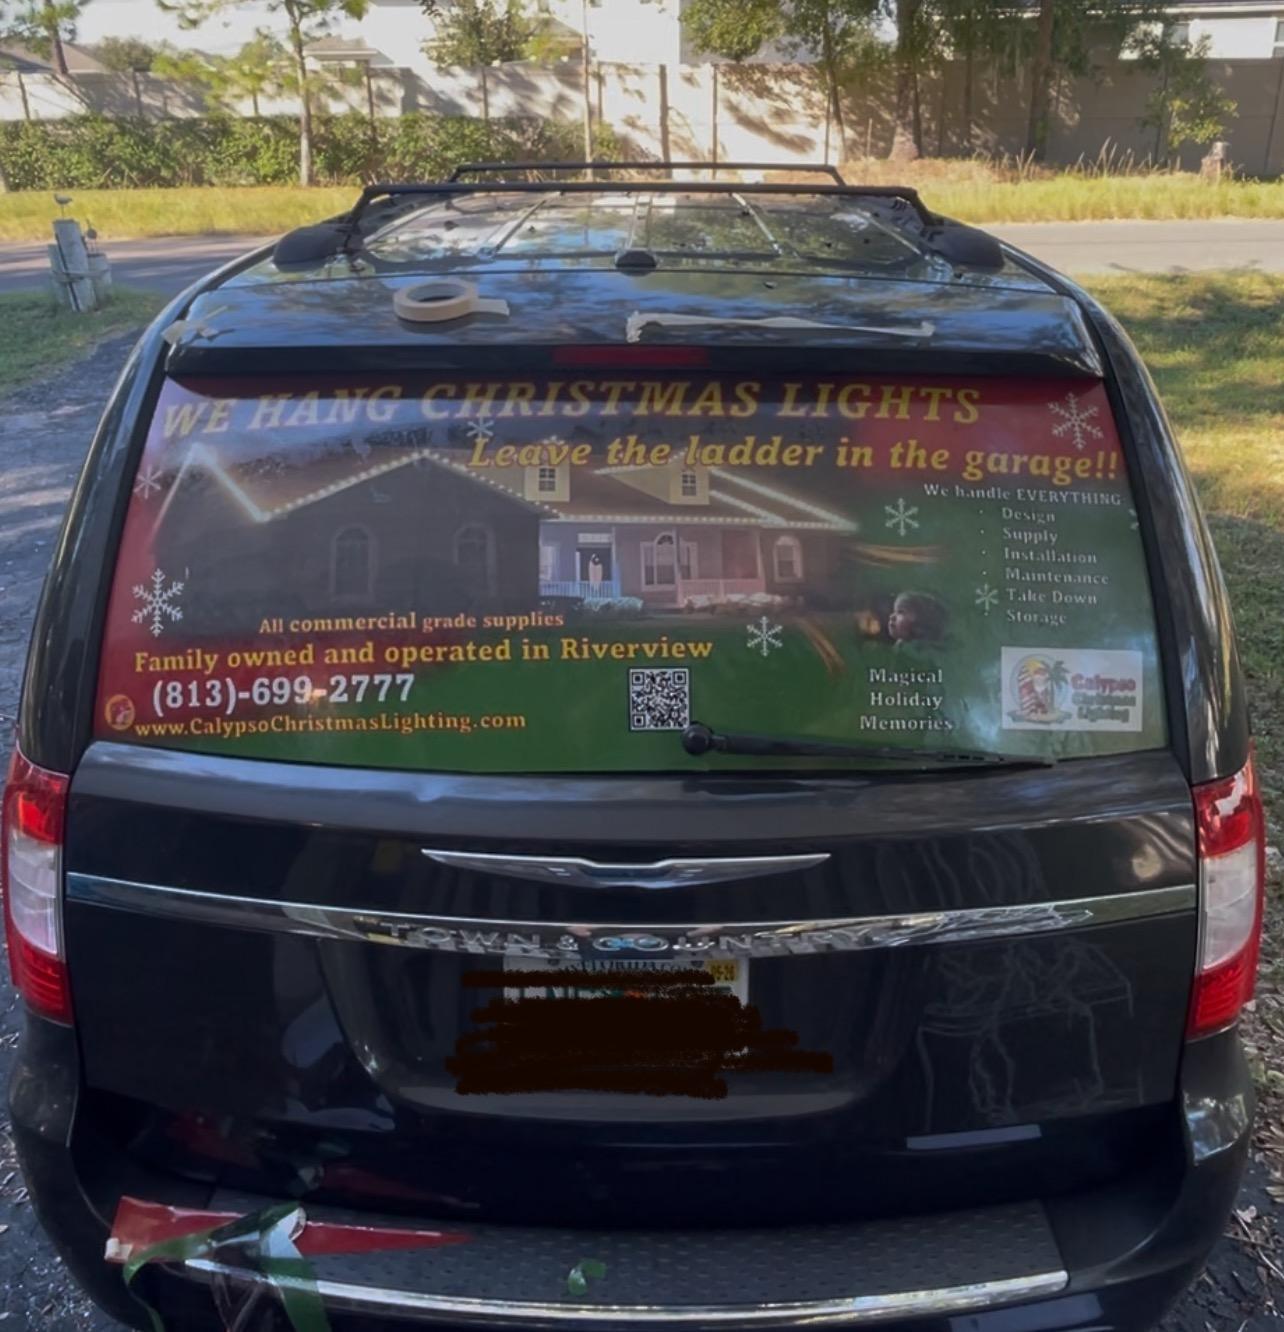
Rear window graphics (also known as perforated car window decals) are specialized decals designed for your vehicle’s rear and side windows. These decals are made using perforated vinyl, a type of vinyl made with tiny holes called micropunctures which makes 50% of the material. The perforation allows the design on the decal to be visible from the outside and see-through from the inside.
Using rear window graphics is a great way to advertise your business or show off a custom design while maintaining clear visibility when looking out your vehicle’s windows. Custom rear window graphics are commonly used to cover the entire rear or side windows on cars, trucks, jeeps, vans, commercial vehicles, semi-trucks, and any other type of vehicle with windows.
Rear Window Graphic Features

-
Easy to Install:
No need to pay for professional installation. Install your perforated window decal on your car or truck in a matter of minutes with the assistance of our installation instructions or installation video.
![Clear Vehicle Decal Checklist Icon]()
-
Vibrant/High Quality Colors:
Your custom design will be printed onto perforated vinyl material using world-class printers. Premium ink is used with an advanced four-color process, designed to leave your graphic’s colors looking vibrant for several years.
![Clear Vehicle Decal - Indoor Outdoor Icon]()
-
Wide Range of Sizes:
You can order your rear window graphic in just about any size you can think of, making sure you get the perfect size and only pay for the material you need.
![Weatherproof Icon]()
-
Adheres to Outside of Window
Applying your car window sign to the outside of the window ensures that your message will be seen and will not be washed out by window glare, tint, or dirt. It is also specifically made to withstand outdoor use.
![Transparent Icon]()
-
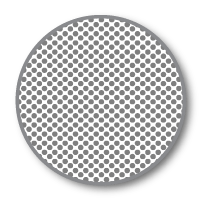
50/50 Micro-perforated pattern:
50% of your rear window graphic will consists of micro punctures that provide one way visibility. This helps you maintain safety while driving, allowing you to still see clearly out the window.
![CutLines Icon]()


- No extra cost
- Helps maintain image quality
- Blocks harmful UV rays
- Repels water
- Prevents dirt and grime from getting into perforated holes
One-Way Vision
Using rear window graphics and signs is one of the most effective and safe ways to advertise your products, services, or business on your vehicle. When using other decals, they tend to obstruct vision and can even lead to unsafe driving. Rear window graphics allow you to display large messages and still maintain full visibility of your surroundings.
Additional Specs
-
Weight
.09lbs per square foot (about the weight of 9 quarters)
-
Thickness
.017" (about the thickness of 4 sheets of copy paper)
-
Perforation Size
.060" (1.5mm)
-
Details
Perforated, long lasting, privacy, removable
-
Uses
Indoor/Outdoor. Vehicle windows, business advertising, custom designs
-
Print Method
Four color process, eco-friendly, weather, fade and abrasion resistant UV ink
-
Estimated Lifespan
3+ years with proper placement and care
Selecting the Best Size and Design for Your Perforated Car Decal
1. When measuring the size of your car or truck window, be sure to measure the largest width and height to ensure that your sign will cover all areas of the window.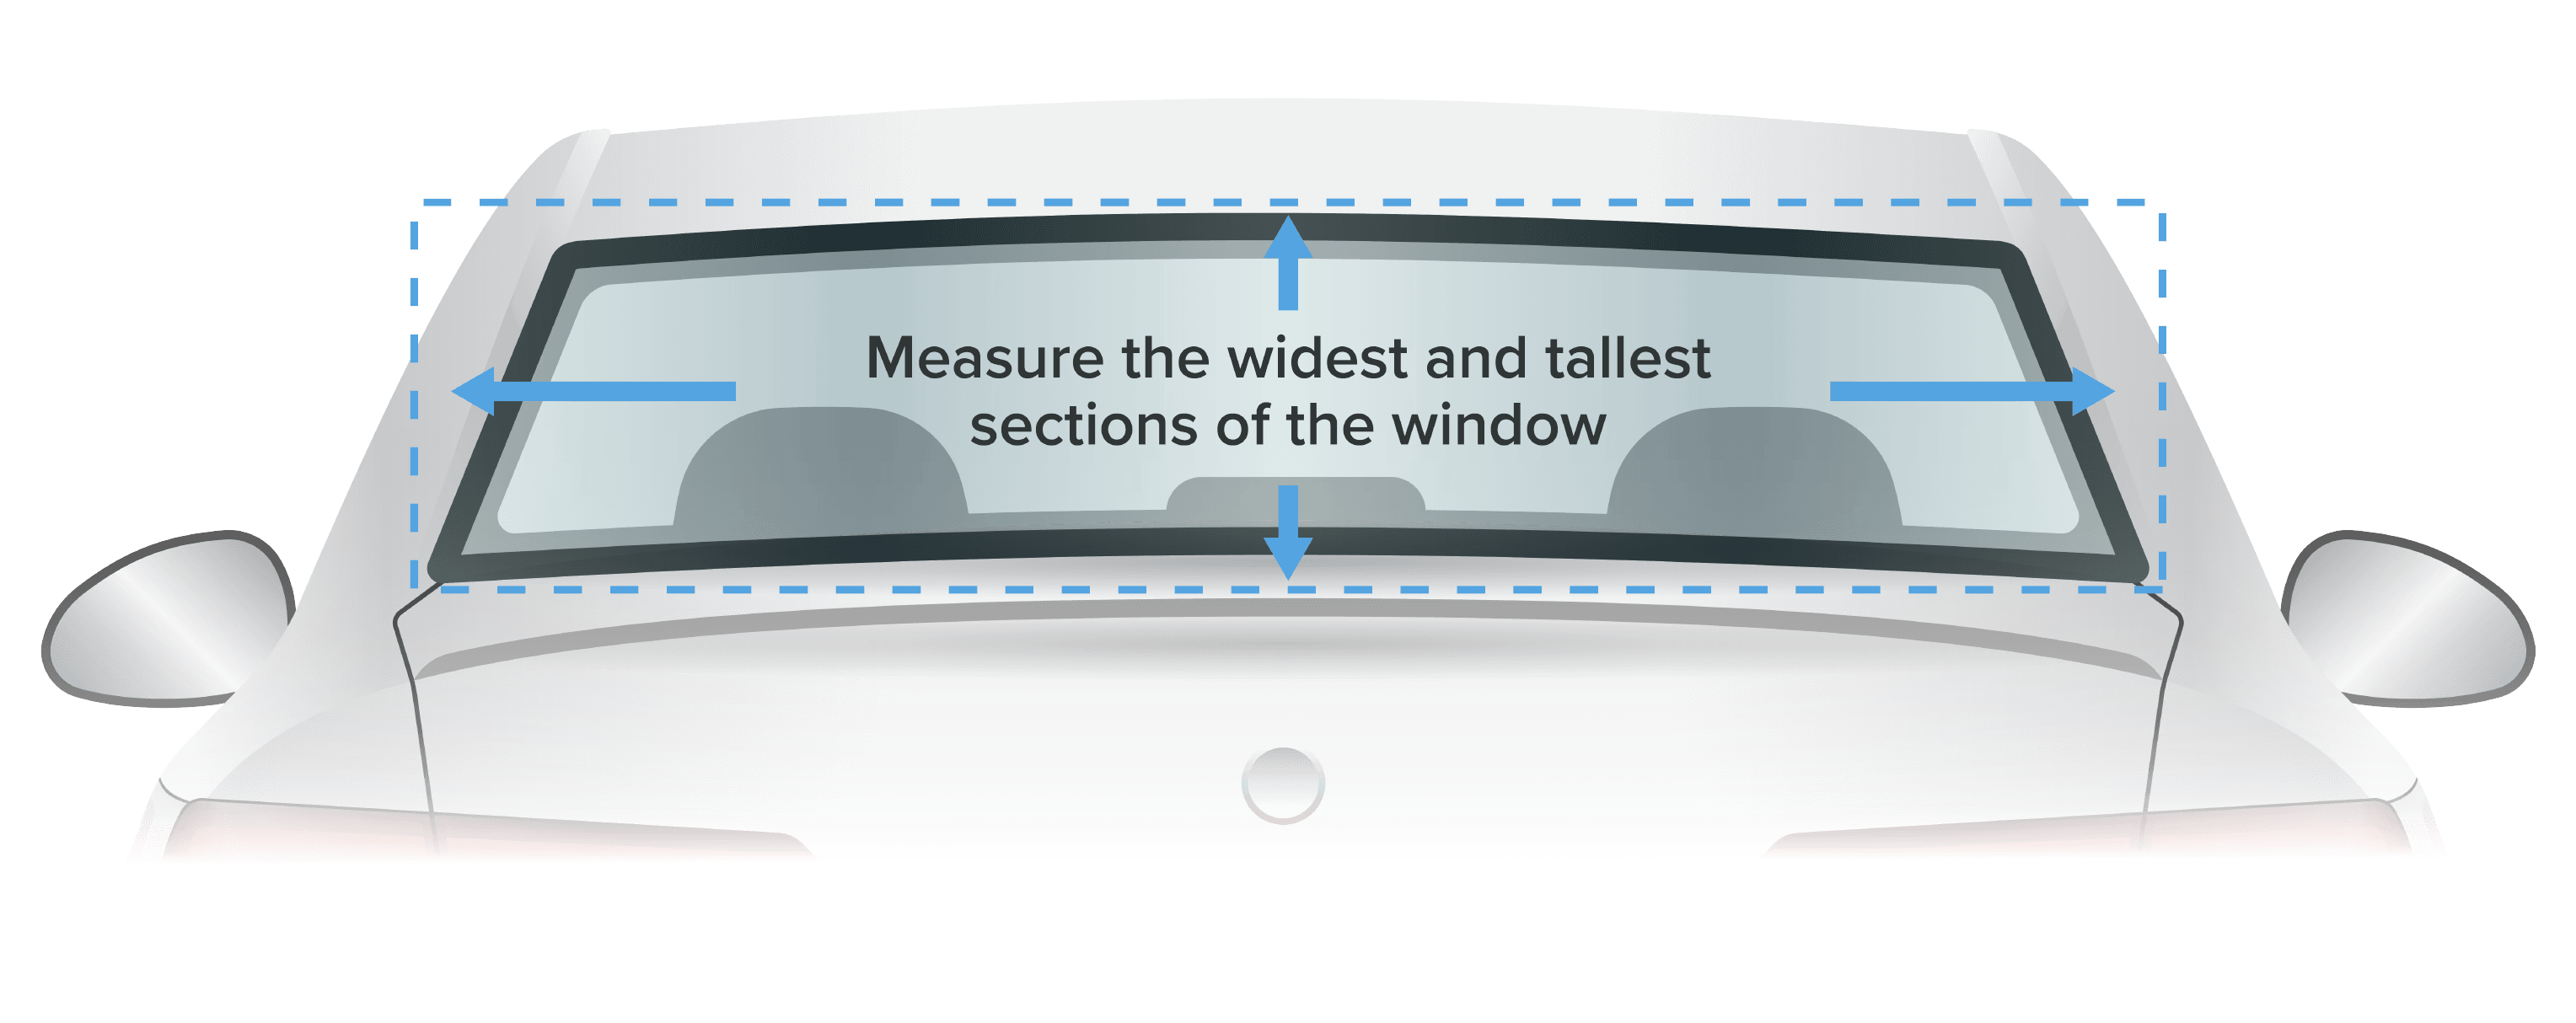


Simple Installation with No Professional Help Required
Installing your rear window graphic is a simple and straightforward process that does not require any professional help. A set of instructions will be included with your order to assist you. You may also view the installation instructions below or download the installation instructions PDF just below the instructions.
Please Note: This is not a decal meant for wet install, so please do not use any water on the decal or window when installing.
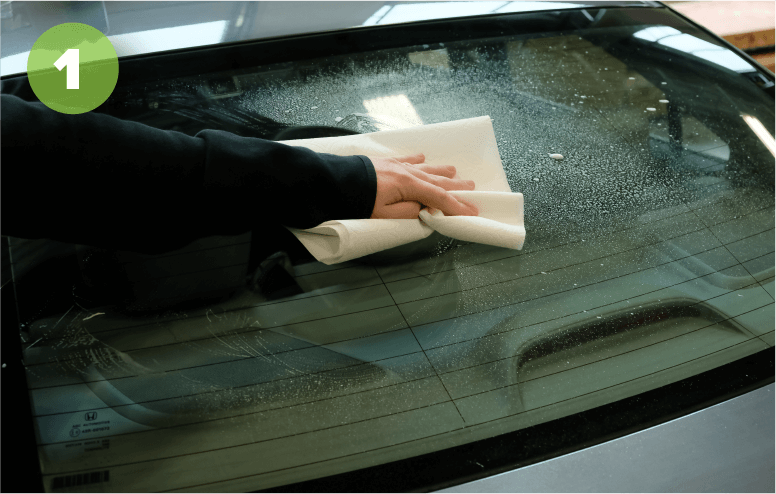
Clean your car window, removing all dirt and grime from the surface. Allow the window to fully air dry before proceeding.

Lay out your decal on your vehicle’s window with the backing still on and make sure it is aligned properly and that you’ve ordered the correct size.
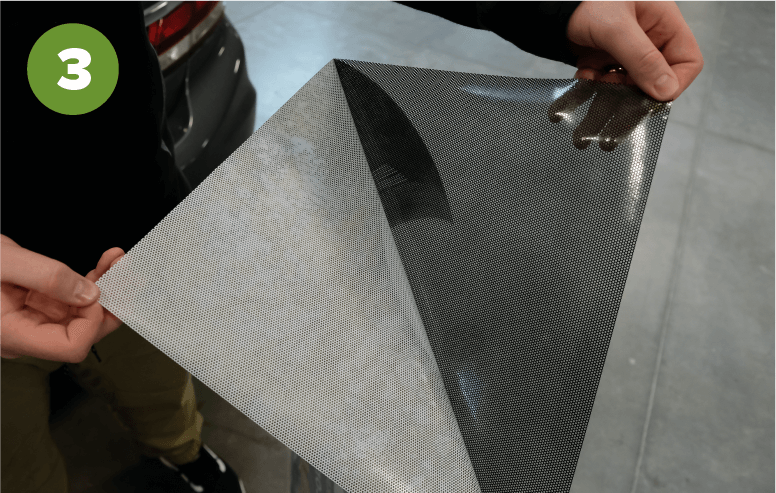
Pull the decal away from the window and remove the backing, exposing the black adhesive side of the decal. If the backing appears to be tearing when removing it, this may be because you are not removing all layers of the backing. When removing the backing, you should be able to see the back of the graphic, which is black.

Place the graphic back onto your vehicle’s window, making sure it is aligned with the markings made previously. Begin to apply to the window, using a squeegee* or flat edge. Start from the center of the graphic and work your way towards the outer corners.
*Available for purchase with your rear window decal
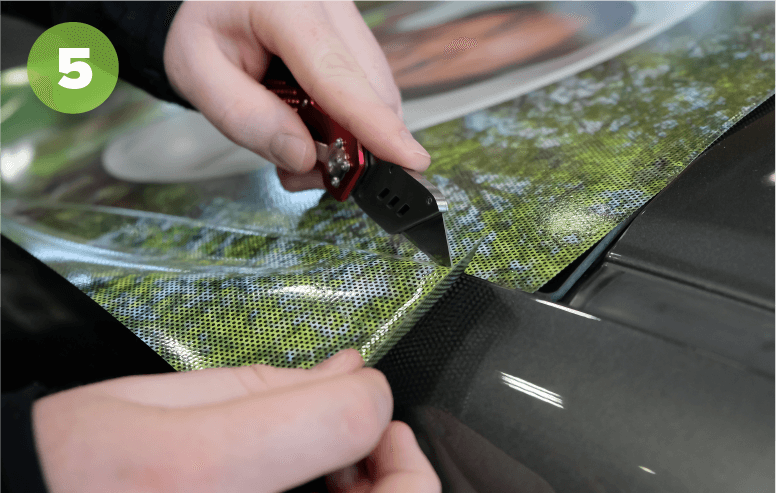
Once you have applied the entire decal to your window, remove the excess material around the edges using a razor blade. Be sure to use caution when doing this to avoid damaging your vehicle’s window or paint.
Download or Print Rear Window Graphic Installation Instructions PDF
Care
Perforated car decals are safe for manual car washes and will stand up to most exterior elements. Avoid automated/automatic car washes and power washers when washing your car. To extend the life of your decals, avoid parking in direct sunlight for extremely long periods of time. Remove dirt and other buildup regularly with a damp, non-abrasive cloth to keep adhesive strong.How to Use the Perforated Car Window Decal Templates
Want to design your vehicle with perforated decals but don’t know where to start? Let Signs.com help you with that! Use our free design templates to customize your first car decal — you can play around with these designs and create original artwork that suits your vehicle perfectly! Whether it's for promoting a business or making your car stand out with unique decor, our vehicle window decals will do their job perfectly.


How to Use the Perforated Car Window Decal Templates
- Choose the custom decal template of your choice and click on it. You’ll immediately get redirected to our online design tool.
- While in the tool, you can update the existing template’s design. Add logos, change the color scheme, and put text on the design using our versatile design tool options.
- Once you’re satisfied, you can go ahead and place your order. As soon as your order and payment have been confirmed, our team at Signs.com will turn your custom design into a perforated car window decal. You may also request a free proof of your design, with edits and changes made by our design team to improve your artwork further before printing.
Easy to Use
Design Tool
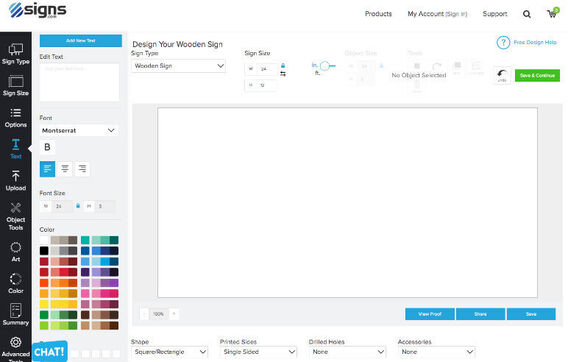
Create your custom wooden sign with our simple and easy design tool. Upload images, create objects, add text, adjust sizing, change color, and so much more!
Check It OutFree Professional
Design Services

Whether you need help uploading your design or are interested in creating something entirely new, our team of professional graphic designers is here to help. Nothing beats free!
Learn MoreAdditional Car and Vehicle Decals

Lettering
No background, letters and objects cut to exact shape
Clear
Clear background, any color combination available

Opaque
White background, any color combination available

Perforated
Perforated material, best for covering entire windows
Permanent Decal
White background. designed for permanent use
Chat with us, contact us, or give us a call at 1-888-222-4929. We’re here to help!
Product Specs
Yes. We also offer clear vehicle decals and opaque vehicle decals. The former is an alternative to the perforated decal as it will be transparent on any portion that does not have something printed on it. Due to the transparency being only where it isn’t printed we recommend that large decals covering an entire window be only perforated car decals. Opaque vehicle decals work great for the side of vehicles in a wide range of uses and business type vehicles. We do not recommend the opaque decals for car windows unless they are small enough that they will not obscure the driver’s ability to see.
There are several different shape options to choose from for your perforated car window decals, including Square/Rectangle, Rounded Corners (1” radius), Circle/Oval, Custom or Custom with Border.
The Custom shape option (previously known, or sometimes referred to, as Contour Cut) allows you to either upload a custom shape to our design tool or have us create a custom shape for your sign based off of your design. The Custom with Border shape option (previously known, or sometimes referred to, as as Halo Cut) is similar to the Custom shape option but will leave a small border around the edge of your design.
There are two things to note with cut to shape perforated decals. The first is that in most cases it is not necessary. This is due to the fact that it offers one way visibility and so it doesn’t matter if it covers the entire window. Unlike other decals that may obstruct visibility and need to be cut this isn’t the case with perforated decals.
The second note is that due to the micropunctures of the perforated decal, cutting will not leave a flush or straight edge. Rather the edge will result in a somewhat ragged edge. While this shouldn’t affect the functionality of your decal we don’t want it to come as a surprise if you decide to choose one of our cut options.
Our recommendation for perforated decals is to simply have them cover the entire window and avoid cutting them to shape.
We print all of our decals (and signs for that matter!) in full color. So unlike other sign shops or printing houses that may charge differently based on the number of colors, we don’t. Regardless of the number of colors or how detailed your design might be it will not make your decal more expensive. We even offer free design services if you need design help.
Yes. If your window is perpendicular to the ground, you should have no issue seeing through the perforated decal. However, if the window is at a steep angle, you may have trouble seeing through the perforated decal. The ‘steeper’ the window, the more difficult it will be to see through the decal.
Usage
Installation & Care
Yes, your decal comes with an adhesive side that is protected by a backing when originally shipped. Removing it is much like peeling a sticker away from a sticker sheet. The easiest way to do so is to start in a corner to get it started. Once started gently peel away the backing to expose the adhesive side of the decal.
If the very thin backing is hard to find or remove then a piece of scotch tape can be used to help peel away the backing. Simply put the piece of scotch tape on corner of the backing with part of it sticking off the edge of the sign. Then use the piece of tape like a tab and pull the backing away.
Please be sure to remove the backing slowly and carefully so that you don’t unintentionally leave part of the backing on the sign.
For the installation of your perforated decal, water should not be used. Before installing your decal make sure to read through all the instructions.
The first step is to clean your window with water and allow it to air dry. Once it is dry you can remove the backing protecting the decal’s adhesive side. Make sure the decal doesn’t stick to itself once the backing is removed!
The next step is the initial application of the decal to the window. This should be done lightly and methodically so that as air bubbles or pockets arise the decal can be peeled away and reapplied as needed. The easiest way to accomplish this is to “tack” two of the corners of the decal into place. To tack the corners just gently press the decal against the window in the corners. This will allow you to then apply the rest of the decal working from one side of the decal to the other. Carefully peel it back and reapply as necessary. Using a flat edge such as a squeegee helps to apply the decal without air pockets arising.
Once the entire decal is in place it can be pressed more firmly onto the window to ensure that the adhesive fully sets in. As noted elsewhere, once the adhesive is fully active removing and repositioning your decal will not be possible.
Your decal should be washed regularly. To do so use a wet or damp cloth that is non-abrasive to gently wipe away any build up on the decal. This will help retain the transparency of the decal and the vibrancy of the printed design.
While your decal is installed you should not use power or pressure washers at home nor take your car through automatic/automated car washes. The power of both of these methods can be significant enough to cause the decal to start to peel away or to rip the decal right off the window.
To remove your decal simply pull the decal away from the window. A sharp edge that won’t damage the window itself can be used to help peel it away. Usually no residue will be left, but when the decal is aged or has been exposed to extreme conditions, some residue may be left behind. In these cases most standard cleaners and a scrubbing will remove it.
Difficult to remove decals come off easier when heated up. This can be accomplished by parking in the sun before removing it or even heating up the window with the car’s heat or a blow dryer. Though having to do either of the latter is rare and a last resort option for a decal that may have been in place for years.