


Backlit Decals
 175K
175K
Store Ratings
 Verified Purchase
Verified Purchase
Verified Purchase
Verified Purchase
Verified Purchase
Verified Purchase
Verified Purchase
Verified Purchase
Verified Purchase
Verified Purchase
Verified Purchase
Verified Purchase
Verified Purchase
Verified Purchase
Verified Purchase
Verified Purchase
Verified Purchase
Verified Purchase
Verified Purchase
Verified Purchase
Verified Purchase
Verified Purchase
Verified Purchase
Verified Purchase
Verified Purchase
Verified Purchase
Verified Purchase
Verified Purchase
Verified Purchase
Verified Purchase
Verified Purchase
Verified Purchase
Verified Purchase
Verified Purchase
Verified Purchase
Verified Purchase
Verified Purchase
Verified Purchase
Verified Purchase
Verified Purchase
Verified Purchase
Verified Purchase
Verified Purchase
Verified Purchase
Verified Purchase
Verified Purchase
Verified Purchase
Verified Purchase
Verified Purchase
Verified Purchase
Verified Purchase
Verified Purchase
Verified Purchase
Verified Purchase
Verified Purchase
Verified Purchase
Verified Purchase
Verified Purchase
Verified Purchase
Verified Purchase
Verified Purchase
Verified Purchase
Verified Purchase
Verified Purchase
Verified Purchase
Verified Purchase
Verified Purchase
Verified Purchase
Verified Purchase

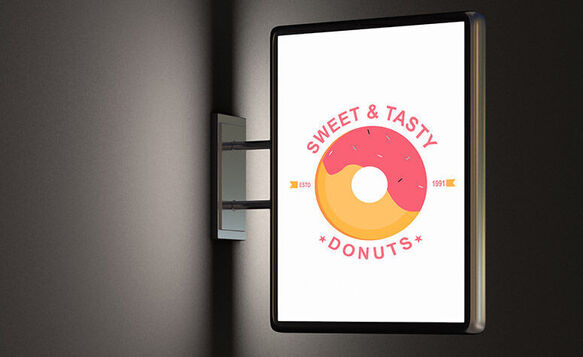
What Are Backlit Decals?
Make your sign shine day or night with a custom backlit decal (light box not included). Made from 3.5 mil adhesive vinyl, backlit decals are designed to withstand exposure to heat from light sources as well as indoor and outdoor elements. Because of the flexible property of the backlit decal, you can easily apply them to windows, light box sign panels or other smooth translucent surfaces for a fantastic light up effect.
Easy to install on acrylic, glass or molded resin, you’ll get a great looking sign that will last as long as you need. If you need to switch out a backlit decal for another, removal is easy. Printed using the best printing technology using UV inks, your backlit sign will display beautifully both day and night.
Backlit Decal Features

-
![Made for Backlit Signage]()
Made for Backlit Signage
Backlit decals are designed specifically to shine. The semi-translucent vinyl defuses light evenly, making for brilliant advertising and business displays.
-
![Easy to Install, Easy to Remove]()
Easy to Install, Easy to Remove
Semi-permanent adhesive, using a solution of water and dish soap makes it easy to install your backlit decal. Remove and replace your decal with a new one as often as you like!
-
![Full Color Printing]()
Full Color Printing
Vibrant and durable, your backlit decal will be printed in high definition color with UV ink.
-
![Standard and Custom Shapes]()
Custom Cut
Round or oval light box? No problem. In fact no matter what shape your light source, you can customize your backlit decal to fit perfectly. If you need assistance with this, just ask one of our design professionals—it's free!


Day & Night Visibility
Backlit decals are perfect for showing off your advertisement day and night.
Although we currently do not offer the light box to go with these signs, you’ll be pleased with the result when using a backlit decal on an existing light box or light source.
Made from durable vinyl designed to last over 3+ years and avoid cracking and embrittlement.
UV and water resistant.
Popular Templates for Backlit Decals
Are you coming up blank with a unique design for your backlit decal? Don’t worry, Signs.com can help! Check out our customizable backlit decals templates.
How to Use Our Templates for Backlit Decals
Transform our backlit decal templates into your own one-of-a-kind design by following these steps.
- Click on your preferred design from our backlit decals template page to access our design tool. We recommend that you do this on your desktop computer.
- Specify the size, quantity, shape, and your preferred accessories (if any) under “Configuration”.
- Use the rest of our design tool’s features to personalize your chosen backlit decal template.
- Click “View Proof” to check your progress. You can also toggle the Ruler, Bleed, and Grid lines to check whether your design elements are properly placed.
- Once you’re satisfied with your design, click “Save & Continue”. Otherwise, click “Save” so you can go back to your unfinished work later.
Create your custom backlit decal with our simple and easy design tool. Upload images, create objects, add text, adjust sizing, change color, and so much more!

Whether you need help uploading your design or are interested in creating something entirely new, our team of professional graphic designers is here to help. Nothing beats free!
Additional Specs
-
Weight:
.08lbs per square foot (about the weight of 8 quarters)
-
Thickness:
0.006” (about the thickness of 1 sheet of copy paper)
-
Details:
Backlit decal to install over a rigid backlit surface or light box panel. Semi-translucent when backlit, self-adhesive, day and night visibility, removable, adheres to acrylic, glass, polycarbonate and other smooth translucent surfaces
-
Uses:
Indoor/Outdoor. Adheres to light boxes, storefront windows and other smooth translucent surfaces
-
Print Method:
Four color process, eco-friendly, weather, fade and abrasion resistant UV ink
-
Estimated Lifespan:
3+ years with proper placement and care
-
Common Sizes (WxH):
12”x24”, 18”x48”, 24”x72”, measure to cut
Simple Installation with No Professional Help Required
The following installation instructions will help you with a quick and easy installation of your custom backlit decal. Instructions will also be included with your order, and you are free to refer to this page or download a PDF of the instructions for assistance. If you are installing a large decal we recommend having at least one other person assist you.
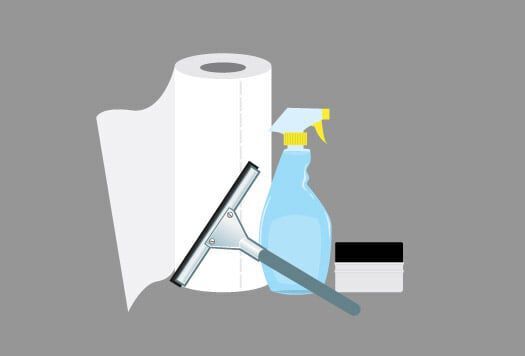
Before you begin to install your custom backlit decal, we recommend gathering the following supplies to help with the process:
- Spray Bottle
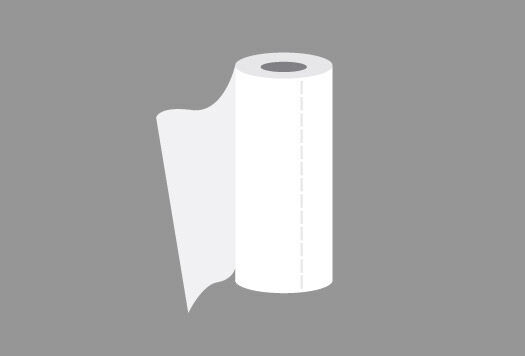
- Paper Towels
- Application Squeegee (available for purchase with order)
- Window Squeegee

Begin by thoroughly cleaning the light box panel, acrylic or glass surface you intend to use for your backlit decal—any household window cleaner will work. After cleaning, use a window squeegee to remove excess water or allow appropriate time for the window to air dry.
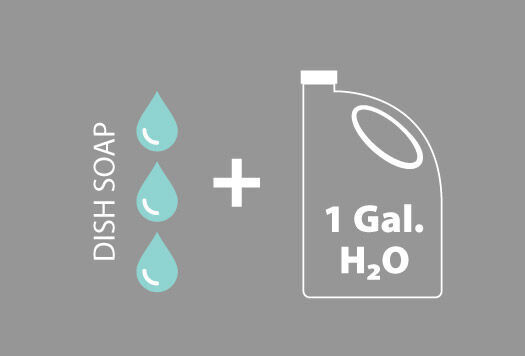
Create a decal application solution by combining 3 drops of dish soap or detergent (not hand soap) per 1 gallon of water and place into a spray bottle.
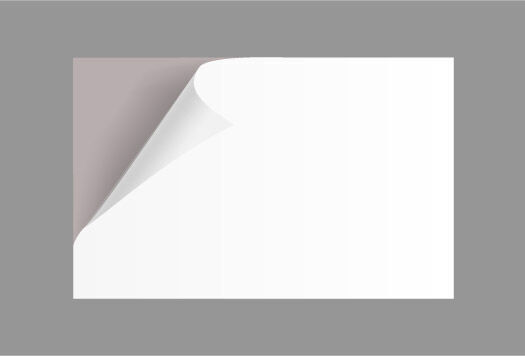
Lay your backlit decal face down on a flat, smooth surface and carefully begin to remove the back liner.

As you are removing the backing, generously apply the application solution to the back of the decal. Next, spray a generous amount of application solution to the desired surface, making sure both the adhesive side of the decal and the panel surface are now sufficiently wet. Do not submerge the decal into water in an attempt to soak the adhesive side.
You can now apply your backlit decal to the desired window or glass surface. The application solution will allow the decal to slip and move once it is on the light box panel or window. Use this to your advantage by sliding the decal into the final position you would like it to be.

Once the backlit decal is in its final position, place the removed backing over the face of your decal and use the application squeegee to remove air bubbles/application solution from under the decal. When doing so, start in the center of the decal and press firmly to the right or left edge. Continue this process until you have ran the squeegee over the entire surface of the backlit decal.
Use paper towels to clean the edges of the backlit decal and around the light box or window. This will help remove excess water from the edges of the decal. It may take several days for the adhesive to fully dry and bind to the panel or backlit surface.
Download or Print Backlit Decal Installation Instructions PDF
Care
To increase the longevity of your backlit vinyl decals, we recommend regularly cleaning them with a damp, non-abrasive cloth or rag. Gently wipe the decal down to remove dirt and dust. Do not power wash the decal, as doing so may cause it to tear or dislodge from the surface of the sign. Power washing might also ruin the light source behind the backlit panel. If you need to remove or replace your backlit decal, simply peel it away from the surface. In some cases, a sharp edge or heat source such as a blow dryer may be needed. After removing the decal, clean the surface with any standard window cleaner.

Why Signs.com?


Chat with us, contact us, or give us a call at 1-888-222-4929. We’re here to help!
Product Specs
A backlit sign is typically one that is placed in front of a light source. The sign itself will be semi-translucent to allow the light to shine through and illuminate whatever may be printed on the sign.
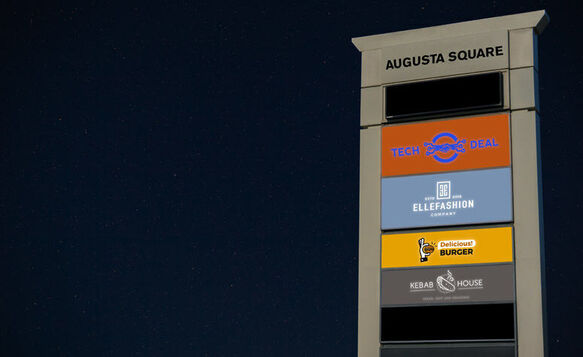
The most common setup is a light box that consists of a light source within a structure that in some way accommodates a rigid piece of material to be placed or slid into it. You often see these roadside advertising small businesses. The sign itself can either be printed onto a milky white rigid material or a vinyl overlay that is applied to the light box or setup.
Our backlit sign uses the vinyl overlay or decal approach. This means that your sign will be printed onto a piece of adhesive vinyl and can be applied to a translucent rigid material for a light box, window or other surface that has a light source behind it. The material itself is called FLEXcon LITEcal and is a durable material that provides light diffusion and ultimately gorgeous signs.
All of the FAQ on this page will deal with the backlit film we offer and not the alternative solution of printing on a translucent rigid sign or a similar signage solution.
The backlit decal is 3.5 mil (.0035 inches) thick, like a few sheets of printer paper stacked together.
There are several different shapes you can choose from for your backlit decal including Square/Rectangle, Rounded Corners (¼” or 1” radius), and Circle/Oval. You can also choose Custom or Custom with Border.
The Custom shape option allows you to either upload a specific shape to our design tool or have us personalize a shape based on your design. Meanwhile, Custom with Border shape, also known as Halo Cut, adds a thin border around the edge of your design.
Due to the size allowed by our industrial printers, your backlit decal can’t be smaller than 8” x 8” and larger than 60” x 400”.
All our signage products are printed in full color so it doesn’t matter how detailed or how many colors your design might have. The factors that influence cost are quantity, size of your sign, and any applicable taxes and shipping fees.
Although the default color of the adhesive vinyl is white, we can print any color you can imagine. For instance, if you prefer an all-black design, you just need to make your design with a black background.
Due to the material and its intended application, making a double-sided decal is not possible. The material is designed to have a light behind it and can only be seen from one direction. If your light box has two sides, you’ll need to order two backlit decals.
The typical lifespan of our custom backlit decals is three years or more depending on installation, maintenance, and usage. Decals that are placed outdoors and are continually exposed to the elements may have a shorter lifespan.
We print all our signs with UV ink to ensure that they stay vibrant regardless of where they are placed. Any sign will begin to wear out at some point but we’re confident that you’ll be pleasantly surprised with how long your sign will look good as new.
The light source shouldn’t hurt nor damage your sign in any way. While it’s common sense not to normally put a sign so close to a light source due to the heat your backlit sign is designed for just this use. The only way the actual light source may impact your sign is the visual impact it conveys. Notwithstanding, your design will in large part drive this visual impact and not the light itself.
Backlit film and backlit overlays are often used interchangeably but take note that backlit overlays can sometimes be non-adhesive.
Usage
Our backlit decals are easy to peel off and will not leave any residue on the surface. There’s no need to use a sharp object to lift any corners.
Our backlit decals are designed for indoor and outdoor use. However, the material will not stick to porous and rough surfaces.
Many businesses use backlit decals to advertise to passing traffic. Another very common use is as storefront signage to display store hours or to promote sales and promos.
Inside establishments and in darker locations such as subways and movie theaters, backlit decals are used as wayfinding signage.
Yes. However, constant exposure to water may impact the lifespan of your decal.
The backlit decal is semi-translucent so the design can easily be seen against a light source. Note that if you plan to cover your entire storefront, the decal can block the view when it’s dark or when the lights are off.
Unlike our other decals, backlit decals can't be reverse-printed because the design can only be printed in front of the adhesive.
No. Removing the actual backlit film and trying to reposition it on the same light box or a different one altogether will not work. The backlit film is not intended to be reusable.
Of course if the film is applied to a rigid piece and you are moving both of them without removing the decal from the rigid material then it is possible. You simply will need to verify that the new light box or location will be compatible with the existing specifications of your rigid piece of material.
Installation & Care
Installation of your backlit decal is easy. After ensuring that the surface where it will be applied has been cleaned and allowed to air dry, remove the thin backing protecting the adhesive side of the backlit sign.
Then, using a spray bottle with water mixed with a few drops of baby soap, liberally spray both the adhesive side of the decal and the surface you plan to apply it to. Thoroughly wetting your decal with water is key to a clean and smooth installation.
Carefully use a squeegee to squeeze out excess water and any air from behind the decal. Prior to using the squeegee, you should be able to peel it back up for any necessary repositioning.
For larger decals, it’s best to ask for help so that you can install it properly. One person can focus on applying the sign and removing air bubbles, while the second person holds the sign to ensure that it doesn’t stick to the surface before it should.
Prior to installation, your backlit decal can be either rolled or stored flat in a cool, dry location. If rolled during storage, nothing heavy should be placed on top of the decal to avoid creasing.
Wipe your backlit decal regularly with a damp, non-abrasive cloth to remove built-up dirt and grime.
Our backlit decals are generally easy to peel off. For decals that have been around for a while, you may need to apply heat using a blow dryer to soften the adhesive. Wipe off any residue with a damp rag.
Regular cleaning will help your backlit decal stay vibrant while it is in place but avoid power washers since the force can wash off the adhesive.