


We continue our “Signage 101” series today with our first video installment about custom vinyl banners. The video talks about our banner material, installation, maintenance and care, and more in order to keep help keep your banner in great condition.
Video Transcription
Hi, I’m Nelson James. I’m here at Signs.com to give you a comprehensive overview of our custom vinyl banners. Today we’re going to talk about what a vinyl banner is and how to install, care for, and properly maintain it. We’ll then go over a few tips on the removal and storage of your custom banner.
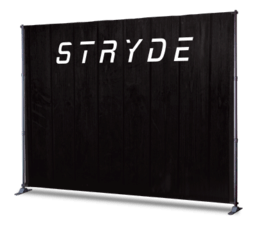
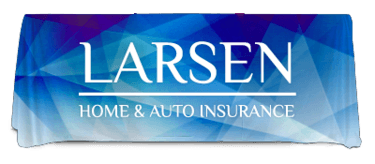
To begin, vinyl is your most commonly used material when it comes to producing banners because of its durability and low cost. So, whether you’re a business looking to promote a new store by hanging a sign on a building, a parent wanting to put up a sign in the front yard for your kid’s birthday, or an event planner looking for an effective way to direct guests to a destination, vinyl banners really are the most versatile and cost effective form of signage.
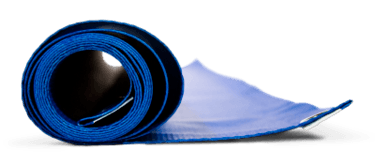
So what is vinyl? Vinyl is basically a plastic PVC material that includes some additives to make it softer and more flexible than what you see in the standard PVC piping underneath your kitchen sink. This flexibility allows it to be rolled and unrolled for easy shipping, printing, installation, and storage. Vinyl banners can come in a variety of thicknesses and weights. Here at Signs.com, our most popular banners are produced on 13 ounce vinyl, the same material that is used to produce billboards alongside the freeway. Thirteen ounce vinyl is the best combination of weight and thickness for durability and price. Our 13 ounce vinyl is also scrim reinforced, which means there is a web of thread at the core of the vinyl which provides added strength.
Like all of our signs, our banners are printed in full color using UV inks, which create better color saturation, density, and image quality. The ink is also more durable because when printed and cured, it acts like a thin layer of plastic. Perhaps the best part of using UV ink is the reduced impact on the environment. There is less waste and virtually no Volatile Organic Compounds, or VOC’s, released into the air during production.
One of the first things you will notice about our banners is the hem. Each banner is heat welded rather than glued, stitched or taped. The welding process melts the vinyl together to form an incredibly strong bond that will prevent the banner from fraying. We also add metal grommets with three eighths inch openings every 24 inches to each banner to give our customers the most flexibility for installation. Both of those options come standard on all the banners produced at Signs.com.
In addition to our standard finishes, your banner can be customized to fit any specific need you may have. Other options for fabrication are leaving it flush cut without a hem, or adding pole pockets for installation on wooden or metal dowels.
When it comes to installing your banner, there are a lot of options. Typically, our customers will use rope, bungee cords, or zip ties to attach the banner to a pole or to hang it from a ceiling. Another option is to use a screw or bolt to attach the banner to a more rigid material like wood, drywall, concrete or brick. If you decide to use a screw or bolt, we recommend using a washer on either side of the grommet for added protection.
If you want to get the most life out of your banner, try to install it in a location that doesn’t get a lot of extreme sunlight or weather. We do suggest taking the banner down if you are expecting a serious wind storm. This way your banner will last for years to come. Caring for your banner is relatively easy. Just soak a towel in warm water and gently wipe your banner down to remove any dirt or build up. Doing this every few weeks will keep your banner looking as good as the day it was printed. Removing the banner obviously depends on how you install it. Make sure you remove the ropes, string, bungees or screws from your sign, clean it thoroughly and let it air dry before storing. The best way to store a banner is rolled up tight and laid in a cool, dry room. Try not to store anything on top of your rolled banner because it may crease and possibly damage your sign. When stored properly, your banner will maintain its flexibility and your graphic will remain vibrant.
When you’re ready to install the banner again, unroll it and lay it flat for a while. If you notice wrinkles or creases, simply place the banner in the sun for a few hours. The vinyl will soften with the heat and the creases will come right out.
So there you have it: everything you need to know about Signs.com’s custom vinyl banners. If you have any questions, we’re always here to help. Leave a comment below or contact us through our website at any time. Thanks for watching.
Related Articles
How to Make a Vinyl Banner – Signage 101.
Standard Vinyl Banner Sizes – Signage 101.
5 Advantages of Using Vinyl Banners.